Thursday, April 3, 2014

Cornish Pasties


We make kind of a big deal about St. Patrick's Day in this family.  I'm not saying anyone dyes their hair green or other such nonsense, but we like to celebrate by listening to Irish and Irish American bands, drink wonderful Irish beer, pretend it's cool and rainy and that we live in Ireland and wistfully think of Boston and our St. Patrick's trip there a few years ago.

I menu plan on Thursdays, so on 3/13 of this year, I was trying to narrow down our St. Patrick's Day menu to something reasonable.  In the end, I found it too difficult to stick to one menu, so we had Irish themed dinners for a whole week!  Mushroom Stout Potpies, Vegetarian Guinness Stew, Guinness and Irish Cheddar Bread, lots of kale and potatoes.  Pardon me if these dishes reflect nothing of Ireland.  As I have never traveled there, these dishes reflect my romantic ideas of what people may eat and what is in season this time of year.  

For the big day itself, I made Cornish Pasties, a delicious root vegetable filled hand pie adapted from Vegetarian Times,  Garlic Sauteed Kale and Guinness Chocolate Cake.  In this post I am going to focus on the pasties, (say pass-tees) as they were the most favorite dish of my dear young lassie.  I like the Vegetarian Times recipe, but I prefer measuring vegetables for something like this by weight.  Also, I found an easier way to assemble the pies and ditched the crust recipe which used margarine and white flour.  This recipe is one that has many steps and takes some time, but also has a big payout.  (13 in this batch!) These freeze wonderfully and make a perfect on the go lunch if you're looking for something other than a sandwich for your midday meal.  To save time on the day of, you can prep the veggies the night before and store them in the fridge.  You can make the dough up to three days in advance, provided you store it nice and airtight in the refrigerator.  

In honor of the special occasion, I strayed from my typical pocket pie crust recipe and went with a Cheddar Pie Crust adapted from Martha Stewart's recipe.

This will typically make 16 pies, but I made them slightly larger this time so it only yielded 13.  These freeze well so feel free to double the recipe if you have a bit of extra time.  Freeze leftovers individually on baking trays before moving to freezer bag.  To reheat, microwave for 1-2 minutes and then crisp up in the toaster oven or just bake in the toaster for 20 minutes.

Makes 12-16 Pasties

Pastry:

2 cups White Whole Wheat Flour
1 teaspoon Salt
16 Tablespoons, 2 sticks, cold unsalted butter cut into small pieces
1/2 cup Ice Water
4 ounces Shredded Kerrygold Cheddar Cheese, or similar cheese

Filling:

1 Tablespoon Olive Oil
1 small Onion, Very Finely diced, 3 ounces, about 1/2 cup
2 Cloves Garlic, peeled and minced
1 small Rutabaga, peeled and diced fine, 7 ounces, about 1 cup
1 small Russet Potato, finely diced, 8 ounces, about 1/2 cup
1 Carrot, finely diced, 3 ounces, 1/2 cup
1 stalk Celery, about 1 ounce
2 teaspoons fresh or 1/2 teaspoon dried thyme
1 large Egg
1 Tablespoon Spicy Brown Mustard
1 ounce Grated Kerrygold Dubliner or Cheddar Cheese, about 1/4 cup


The stars of the show.

All lined up to go in the pot.

Cheese!  


1. For the pastry: Pulse flour and salt in the bowl of a food processor until incorporated.  Add butter and pulse until well blended.  The flour and butter will resemble coarse cornmeal.
2. Slowly add the ice water, pulsing after every few tablespoons, until the dough just begins to hold together.  The dough should not be too dry or wet and sticky.  If the dough is too dry, add some more water.  If it's too wet, add flour a bit at a time to reach desired consistency.  It should be like play dough!   
3. Add cheese and pulse to combine.
4. Shape dough into two disks, wrap well and refrigerate until chilled, at least 30 minutes or up until three days.  You may freeze the dough if you wish to store it longer.

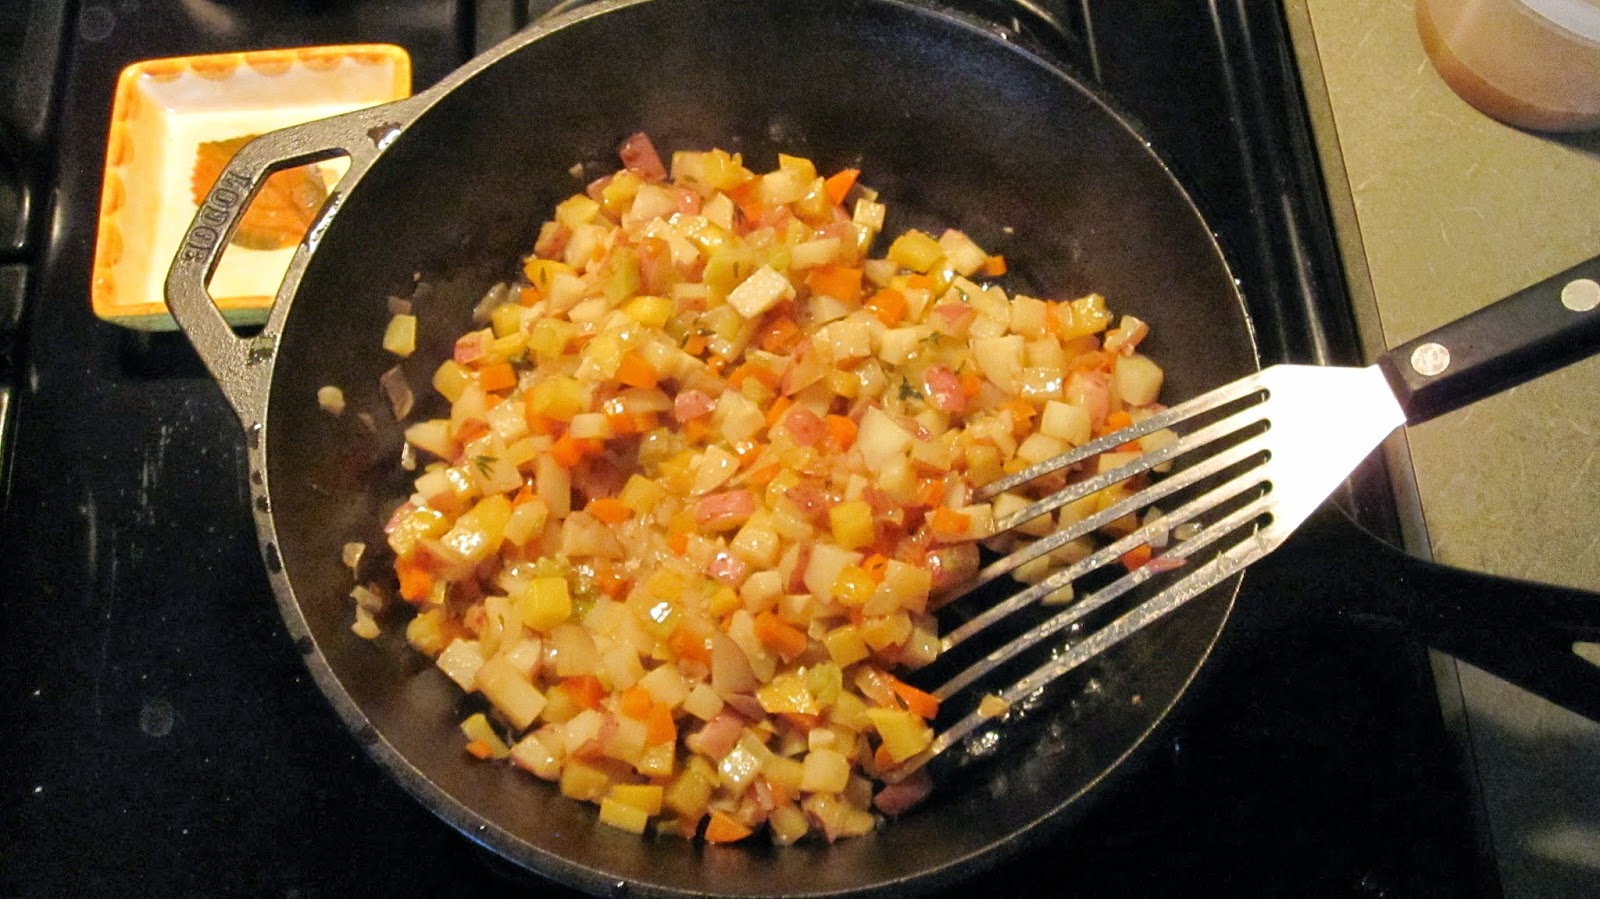
5. For the filling: Heat oil in large skillet over medium heat. Add onion and celery and cook 5 to 7 minutes, or until onion is lightly browned.  Add garlic and cook for about a minute more. Add rutabaga, potato, carrot, and thyme and cook about 3 minutes.  Add 1/2 cup water, cover pan and reduce heat to low.  Steam vegetables 10 to 12 minutes, or until tender.


Sauteed filling.

I got this Lodge "multicooker" for my husband.  I think I use it more than he does.  

Steamed filling.

6. Whisk 1 egg with mustard in large bowl. Stir in cooked vegetables and cheddar and season with salt and pepper to taste. 
7. Preheat oven to 400°F. Line a baking sheet with a non-stick silicone mat or parchment paper.  
8. Remove one disc of dough from the refrigerator.  Cut into eight equal pieces using a pizza wheel or knife.  


Form each section into a rough ball, flatten slightly and dust with flour.  

Roll each piece of dough into a 5 inch disc of ¼-⅛ inch thickness.  
I used the press to make the discs and flattened them out slightly with the rolling pin.

You can use a tortilla press to make quick work of this task.


Using a pie crust bag will ensure the dough doesn't stick to the press.  You could also use a plastic bag, cut open along the seems.

Repeat with remaining dough. 
9. Fill each disc with 2-3 tablespoons of filling. Fold dough over filling to make a semicircle. Press dough around filling to remove any air, making sure no filling leaks out of edges. Crimp edges with your fingers or fork tines to seal. 


A cookie scoop works well here to portion out the filling.

The bottom left pie is starting to melt.  Better get these babies in the oven!  Also, used a fork on that bottom left one...not very pretty.  I sealed the rest by hand.  

Repeat with remaining dough and filling. 
10. Bake on prepared baking sheet 25 to 30 minutes, rotating sheet halfway through baking for even browning.  Let cool 5-10 minutes before taking a bite, enjoy!


Ahhh.

And yum.


Shared at Clever Chicks Blog Hop.


Friday, March 14, 2014

Masa Harina Cornbread

I don't like buying ingredients that will only make one recipe.  I bought some masa flour to make homemade corn tortillas and really wanted to use the flour in another application.  It turns out, masa flour makes very good cornbread.

This recipe is a southern style cornbread, no wheat flour and no sugar.  If you like a sweet cornbread, you'll probably want to skip this one.  In fact, I adapted the recipe from one titled, "This Ain't No Yankee Cornbread" from The Lodge Logic Cookbook, how's that for southern style?

I find that when subbing masa for cornmeal, you need to add much less salt.  If you are looking to sub masa for your own recipes, I'd try using half the salt you normally would.


Makes 8 Large Pieces of Cornbread

2 Tablespoons Melted Butter
1 cup Masa Harina Flour
1 teaspoon Baking Powder
1/2 teaspoon Salt
1 large Egg, lightly beaten
1 cup Milk
1/2 cup Plain Yogurt

1. Preheat oven to 425 degrees.
2. Place 1 Tablespoon of the butter in a 10 inch iron skillet or spread between molds of a cast iron pan.  Place in the oven while it preheats.
3. Whisk together the masa, baking powder and salt in a small bowl.  Whisk together eggs, milk, yogurt and remaining butter in a medium bowl.  Add the dry ingredients to the wet and mix until just combined.
4. Remove hot skillet or mold from oven and pour in hot batter.
5. Bake until crust is dark golden brown and center is set, about 15-20 minutes.

Thursday, March 13, 2014

Sweet Potato Apple Chili

In this neck of the woods, we had pretty much figured that spring had sprung.  We have lovely blooms on Tulip Magnolias and Bradford Pears and some early spring flowers are proudly displaying their colors, yellow and white daffodils, pink and purple hyacinth.  Warm days (80's!) combined with daylight savings time made winter seem like a distant memory.  Then the wind blew in more chilly weather and at least one more overnight freeze.

This recipe for Sweet Potato Apple Chili is full of warm fall flavors that should help you through the last cold snap before spring is here to stay.  Apple cider, sweet potatoes and apples lend a sweet component to this slightly spicy chili, which should please little palates.

Seconds after taking this picture, my daughter stole and ate the cactus cornbread.  
I prefer using dried beans over canned because they are way cheaper and you can control the ingredients, cooking medium and process for the beans.  For instance, a long soak in a salty brine before cooking will make beans much more tender and easier to digest (a great tip from Cooks Illustrated).  Most beans triple in size during soaking and cooking, so 1/2 cup dried beans will yield 1 1/2 cups cooked beans.  If you use canned beans, drain and rinse them well.

Makes about 8 cups or 4 pints to serve 8 or more

1 1/2 cups cooked or canned Red Beans
1 1/2 cup cooked or canned White Beans
1 1/2 cup cooked or canned Pinto Beans
1 Tablespoon Olive Oil
1 large Onion, peeled and diced fine
2 cloves Garlic, peeled and minced
3 Tablespoons Tomato Paste
1 Tablespoon Chili Powder
1 Tablespoon ground Cumin
1 Tablespoon ground Coriander
1 large Sweet Potato (about 12 ounces) peeled and diced into 1 inch pieces
1 large Granny Smith Apple (about 8 ounces) peeled, cored and diced into 1 inch pieces
1 28 ounce can of crushed or diced Tomatoes (for this batch, I used diced, but I prefer crushed)
2 cups Water
1 cup Apple Cider
Salt and Pepper to taste


1. Heat the oil in a 10 inch skillet over medium heat.  Add the onion, cover and cook until onion has softened and is starting to brown.

2. Add the garlic, tomato paste and spices and cook until fragrant, about 30 seconds.  Quickly remove from heat and add to the crock of your slow cooker.


3. Add the diced sweet potato, apple, tomatoes and liquid to the crock and mix well.


4. Cover and cook on low for eight hours or up to nine hours.

Serve with corn bread, tortilla chips or spice cake muffins.


Shared at the Clever Chicks Blog Hop and Meal Planning Monday Recipe Link-Up.

Sunday, March 2, 2014

Vegetable Scrap Broth

We've got a cold running through our house this week.  It started with the little one, moved onto dad and now mom.  This calls for some serious soup!

I truly believe that this Garlic Kale Soup from Vegetarian Times has magical healing properties, which we could all use right now.  It's a very brothy soup, so the quality of the broth is important.  I find that many vegetable broths from the supermarket don't taste like much more than salt and they are all mixed from concentrates anyway with all kinds of flavor enhancers, not to mention pretty pricey for something that is mostly just water.

I have a way to make homemade vegetable broth without a large investment of time or money and you'll feel great knowing that you are wasting less of the vegetables you buy!  Even better, you can compost the vegetables, or in my case put them in the compost pile for the chickens to steal, after you have extracted every last bit of flavor from them.

As I prep vegetables for various dishes, I save the scraps and set them aside in a gallon size freezer bag.  I store the bag in the freezer until it's full and I am ready to make broth.  I only use veggies that are fresh for this, nothing that's starting to go bad.  It's fine to use ugly veggies as long as they're not past their prime.  Also, since I'm using the peels and ends of vegetables for this, I only save organic vegetable scraps for broth.


Good for Broth                                     Not so Good for Broth
Onion peels and roots                           Cabbage
Carrot tops and greens                          Potato Peels
Mushroom stems                                    Eggplant
Fennel fronds                                          Anything Slimy
Garlic ends
Pepper stems
Herb stems
Kale and other greens stems


Once the bag is full or I need more broth, I remove the bag from the freezer and give the scraps a good rinse and proceed as follows:

1. Heat a tablespoon of oil in a 6 quart slow cooker over low heat.


2. Add vegetable scraps and water to cover, leaving at least 1/2 inch of room to the top of the crock.


3. You may also add fresh or dried herbs for extra flavor.  I like to add parsley, thyme and rosemary.  Add 1 teaspoon or more of salt to taste.  Try to add a lesser amount than you think you'll need since you will likely add more salt to your finished recipes.
4. Cover and cook on low for 8-10 hours.  Strain, cool and bottle or bag the broth.

I used to use glass pint jars, but they were taking up too much room in the freezer so I switched to quart size freezer bags with 2 cups in each, perfect for many of my go-to recipes.  You can also freeze some broth in an ice cube tray for smaller portions.


In the end, I got 14 cups of broth, plenty for the brothy soup with lots left over for the freezer and some for a quick lunchtime noodle soup.


Shared at Clever Chicks Blog Hop


Thursday, February 13, 2014

Cast Iron Skillet Panini

It all started with a failed Italian bread recipe.


The loaves spread out instead of rising up.  The bread was still delicious, very soft, probably due to too little flour, and nice crumb.  I halved the loaves lengthwise and widthwise and froze them, hoping to come up with a good way to use them knowing that they would be perfect for paninis if only we had a panini press.

A few weeks later it hit me, why not use two cast iron skillets, one to grill and one to weigh down the sandwich?  While we lack a panini press, we have lots of iron skillets, I love them almost as much as mason jars.  They are inexpensive, indestructible, simple and they cook everything you can think of.  Yes, you will miss the nice grill marks, but you'll still have a nice grilled sandwich.  To further test the idea without wasting ingredients, I searched the Internet to see if this was possible.  Of course theKitchn had a post about it, they think of everything!  If you don't have two cast iron skillets, you could try using a regular stainless steel pan.


For the filling, I used what we had in the fridge.  We are lucky enough to have access to delicious, local greenhouse grown tomatoes and peppers in the dead of winter, shiitake mushrooms and greens.  Feel free to use your favorite veggies or whatever you have that is seasonal in your area.


Tuesday, February 11, 2014

Kale Pesto


While traditional pesto consists of raw herbs, garlic, cheese and oil, this version uses cooked greens and roasted garlic.  Perhaps I should use quotation marks around pesto or just call it kale sauce.  Either way, it's a nice way to use up extra greens you may have on hand and my husband, who is not a fan of pesto, will actually eat and enjoy this.  This recipe is a slight variation of a Collard Green Pesto recipe that I submitted for my local farmer's market cookbook, which I note not just to brag, but to bring up the point that this will work with any hardy green.    

Italian Seasoning

For those times when you want something to taste more italian, try this spice mix.

2 tablespoons dried basil 
2 tablespoons dried oregano 
2 tablespoons dried rosemary 
2 tablespoons dried marjoram 
2 tablespoons cilantro seeds
2 tablespoons dried thyme 
1 tablespoon red pepper flakes

1. Whirl together in a spice blender or coffee grinder.  Store in an airtight container.  

Adapted from Allrecipes.com