Tuesday, April 29, 2014

Corn Fritters

I have wanted to try cooking with refined coconut oil for quite some time.  I have used unrefined, but was interested to try refined since it is supposed to be flavorless and have a higher smoke point than virgin oil.  I usually use olive oil to pan fry, which I realize is kind of a waste of olive oil.  It also ends in a very smokey situation, so we have to leave the doors and windows open with ceiling fans running, not the best thing in the middle of winter.  I finally ordered some expeller pressed coconut oil and decided to make up a batch of corn fritters for dinner to see how it compared to my usual olive oil.

From the freezer since I didn't take a picture before freezing

These fritters are kind of a cross between a hushpuppy and a pancake.  It makes a bunch, which is convenient because they freeze really well.

Makes 30-35 fritters

Corn Fritters

1 cup Masa Harina Corn Flour or Corn Meal, 4 ¾ ounces
½ cup White Whole Wheat Flour, 2 ¾ ounces
1 teaspoon Salt
1 teaspoon Baking Powder
½ tsp Smoked Paprika
1 cup Milk
½ cup Yogurt
2 Eggs
2 cups Corn, frozen or fresh, thawed if previously frozen
1 cup grated cheddar cheese

Refined coconut oil or other for pan frying.

Preheat oven to 200

1. In a medium sized bowl, whisk together the flours, salt, baking powder and spices. 
2. Lightly beat the eggs and combine with the milk and yogurt.  Add the eggs and yogurt to the dry ingredients and mix just to combine. 
3. Fold in the corn and cheese until well incorporated.  The batter will be somewhat thick, thicker than pancake batter, thinner than cookie dough.  

Pretty Thick Batter

4. Heat about a half inch of the oil over medium low heat in a large skillet until shimmering.
5. Scoop heaping tablespoons of the batter and drop into pan.  Use the back of the spoon or a spatula to flatten the top so you have a ½-¾ inch thick patty that is 2-3 inches in diameter.  If the patty is too thick, the outside will burn before the interior is fully cooked.   
Frying


7. Fry for 1-2 minutes until patty is golden brown, flip and continue to cook for 1-2 minutes until the second side is also golden brown.   

And the other side

8. Remove from the pan and place on a plate lined with paper towels to drain some of the oil.  Move to a cooling rack placed over a baking sheet after about 2 minutes and transfer to warm oven while you finish cooking up the rest of the batter.


We did a salsa dressing for this one

We had these as a salad topper, but they would also be good as an appetizer with some salsa or just eat as is!

To freeze, let the fritters come to room temperature.  Place on a baking sheet in a single layer and transfer to the freezer.  Once the fritters are frozen solid, you can transfer to a freezer bag.  Reheat at 400 until warm.  

I'm happy to report that the coconut oil worked really well for frying.  The fritters came out crispier than they normally do and we didn't have to evacuate our kitchen for too much smoke!  If you've been considering making the switch, go for it!

If you try this recipe, please comment below to let me know how you liked it.

Shared at April's Homemaking Meal Planning Monday

Tuesday, April 22, 2014

Not-So-Sweet Strawberry Jam

Hello spring!  After a surprisingly chilly southern winter (nothing compared to what the north experienced), it's nice to see green leaves on trees, flowers blooming and new life everywhere.  It's also nice to see those wonderful "Fresh Strawberries" signs at the local farms!

On Monday, I took the youngin on a road to trip to pick some wonderful fresh, naturally grown strawberries with some friends.  Even though she didn't do much picking, she loved it.  Sometimes she just prefers to supervise.  She had fun playing in the dirt and making Pete the Cat dance alongside the strawberries.  Strawberries don't keep for a long time so I like to work quickly to preserve them.  When we got home I went right to work sorting, washing and stemming the berries.  Some went straight to the freezer while some were destined to become jam. The next day, we had a jam session at our house!  Good company makes the work much more enjoyable and much faster.  Plus, I got to share my jamming knowledge.

This is my tried and true recipe for less sweet jam.  I use Pomona's Universal Pectin so that the jam will gel without using a ton of sugar.  In fact, I only used 1.5 cups of sugar to sweeten 8 cups of mashed berries!  You can really taste the berries in the finished product instead of just tasting sugar.

This recipe yields about 9 cups, enough for 9 8 ounce jelly jars and will last for one year if kept in a cool dark pantry.  Once you open the jar, it's best to eat within 1 month.  This recipe may be halved for a smaller batch, but if you want to double, it's best to cook two separate batches.

Not-So-Sweet Strawberry Jam

5 pounds of Strawberries
4 teaspoons Calcium Water*
1/4 cup Bottled Lemon Juice
1.5 cups Sugar
4 teaspoons Pectin

*To make the calcium water, combine 1/2 teaspoon of the calcium powder included in the box of Pomona's Pectin with 1/2 cup water.  Mix very well.  The mixed calcium water can be stored in the refrigerator.

Prepare for Boiling Water Bath Canning

1. Fill water bath canner or large stock pot with tap water and place over high heat.
2. Wash and sterilize 9 8 ounce mason jars.  You can sterilize the jars by placing them in the canner while the water heats up, boiling for a minimum of 15 minutes.
3. Wash 9 regular mouth dome lids and place in a heat proof bowl.  Once the jam is cooked, you will cover the lids with warm water before placing on jars to seal.  Have 9 regular mouth bands handy.
4. Once the water is at a rolling boil, you are ready to can.

Prepare Fruit


Five beautiful pounds of berries

1. Remove the stem and hull of the berries.  Using a paring knife, pierce the fruit right on the outer diameter of the stem.  Twist the berry around the point of the knife until you have completely circled the stem.  Remove the hull.
2. Mash the berries either vigorously or gently depending on the consistency you prefer for your jam.  You should have 8 cups of mashed fruit.

Eight cups gently mashed for a chunky jam

3. Transfer the fruit to a large dutch oven or stockpot along with the calcium water and lemon juice.  Bring to a boil over medium high heat.
4. Meanwhile, combine the pectin with the sugar in a medium bowl and stir until well combined.

Sugar mixed with pectin

5. Once the fruit mixture reaches a boil, add the sugar and pectin mixture, stirring constantly to avoid clumps.
6. Stir until well combined and return mixture to a boil.

All cooked and ready to go into jars

7. Skim any foam that has risen to the top of the jam if desired.  This foam is nothing more than air bubbles moving through a viscous solution, it is fine to eat but you can skim it if you want a clearer jam.

Get Ready to Can

1. Take the lids you washed previously and ladle some of the hot water from your canning pot to cover.
2. Ladle fruit into prepared jars leaving 1/4 inch headspace, the space between the surface of the fruit and the top of the jar.
3. Wipe the rims of the jars with a damp paper towel, center lid on each jar and tighten band around each lid.

Wiping the rim ensures a good seal

4. Using tongs, pick up each jar individually, keeping it as straight (perpendicular) as possible and place in water bath canner.  Repeat until all of the jars are in the water.
5. Place the lid on the canner and process for 10 minutes.  Turn off the heat and remove the canner lid.  Allow jars to sit in the hot water for an additional five minutes.

Rolling Boil

6. Remove each jar individually, once again keeping the jar as straight as possible, to a cloth towel or napkin lined counter.

Keep jars nice and straight to maintain the seal.

7. Allow the jars to rest undisturbed for 24 hours.  Check the seals, the dome should be sucked into the jar, clean the jars and label.  Enjoy!

Jam and bread
Shared at Clever Chicks Blog Hop and Eating Inside the Box.


Thursday, April 3, 2014

Cornish Pasties


We make kind of a big deal about St. Patrick's Day in this family.  I'm not saying anyone dyes their hair green or other such nonsense, but we like to celebrate by listening to Irish and Irish American bands, drink wonderful Irish beer, pretend it's cool and rainy and that we live in Ireland and wistfully think of Boston and our St. Patrick's trip there a few years ago.

I menu plan on Thursdays, so on 3/13 of this year, I was trying to narrow down our St. Patrick's Day menu to something reasonable.  In the end, I found it too difficult to stick to one menu, so we had Irish themed dinners for a whole week!  Mushroom Stout Potpies, Vegetarian Guinness Stew, Guinness and Irish Cheddar Bread, lots of kale and potatoes.  Pardon me if these dishes reflect nothing of Ireland.  As I have never traveled there, these dishes reflect my romantic ideas of what people may eat and what is in season this time of year.  

For the big day itself, I made Cornish Pasties, a delicious root vegetable filled hand pie adapted from Vegetarian Times,  Garlic Sauteed Kale and Guinness Chocolate Cake.  In this post I am going to focus on the pasties, (say pass-tees) as they were the most favorite dish of my dear young lassie.  I like the Vegetarian Times recipe, but I prefer measuring vegetables for something like this by weight.  Also, I found an easier way to assemble the pies and ditched the crust recipe which used margarine and white flour.  This recipe is one that has many steps and takes some time, but also has a big payout.  (13 in this batch!) These freeze wonderfully and make a perfect on the go lunch if you're looking for something other than a sandwich for your midday meal.  To save time on the day of, you can prep the veggies the night before and store them in the fridge.  You can make the dough up to three days in advance, provided you store it nice and airtight in the refrigerator.  

In honor of the special occasion, I strayed from my typical pocket pie crust recipe and went with a Cheddar Pie Crust adapted from Martha Stewart's recipe.

This will typically make 16 pies, but I made them slightly larger this time so it only yielded 13.  These freeze well so feel free to double the recipe if you have a bit of extra time.  Freeze leftovers individually on baking trays before moving to freezer bag.  To reheat, microwave for 1-2 minutes and then crisp up in the toaster oven or just bake in the toaster for 20 minutes.

Makes 12-16 Pasties

Pastry:

2 cups White Whole Wheat Flour
1 teaspoon Salt
16 Tablespoons, 2 sticks, cold unsalted butter cut into small pieces
1/2 cup Ice Water
4 ounces Shredded Kerrygold Cheddar Cheese, or similar cheese

Filling:

1 Tablespoon Olive Oil
1 small Onion, Very Finely diced, 3 ounces, about 1/2 cup
2 Cloves Garlic, peeled and minced
1 small Rutabaga, peeled and diced fine, 7 ounces, about 1 cup
1 small Russet Potato, finely diced, 8 ounces, about 1/2 cup
1 Carrot, finely diced, 3 ounces, 1/2 cup
1 stalk Celery, about 1 ounce
2 teaspoons fresh or 1/2 teaspoon dried thyme
1 large Egg
1 Tablespoon Spicy Brown Mustard
1 ounce Grated Kerrygold Dubliner or Cheddar Cheese, about 1/4 cup


The stars of the show.

All lined up to go in the pot.

Cheese!  


1. For the pastry: Pulse flour and salt in the bowl of a food processor until incorporated.  Add butter and pulse until well blended.  The flour and butter will resemble coarse cornmeal.
2. Slowly add the ice water, pulsing after every few tablespoons, until the dough just begins to hold together.  The dough should not be too dry or wet and sticky.  If the dough is too dry, add some more water.  If it's too wet, add flour a bit at a time to reach desired consistency.  It should be like play dough!   
3. Add cheese and pulse to combine.
4. Shape dough into two disks, wrap well and refrigerate until chilled, at least 30 minutes or up until three days.  You may freeze the dough if you wish to store it longer.

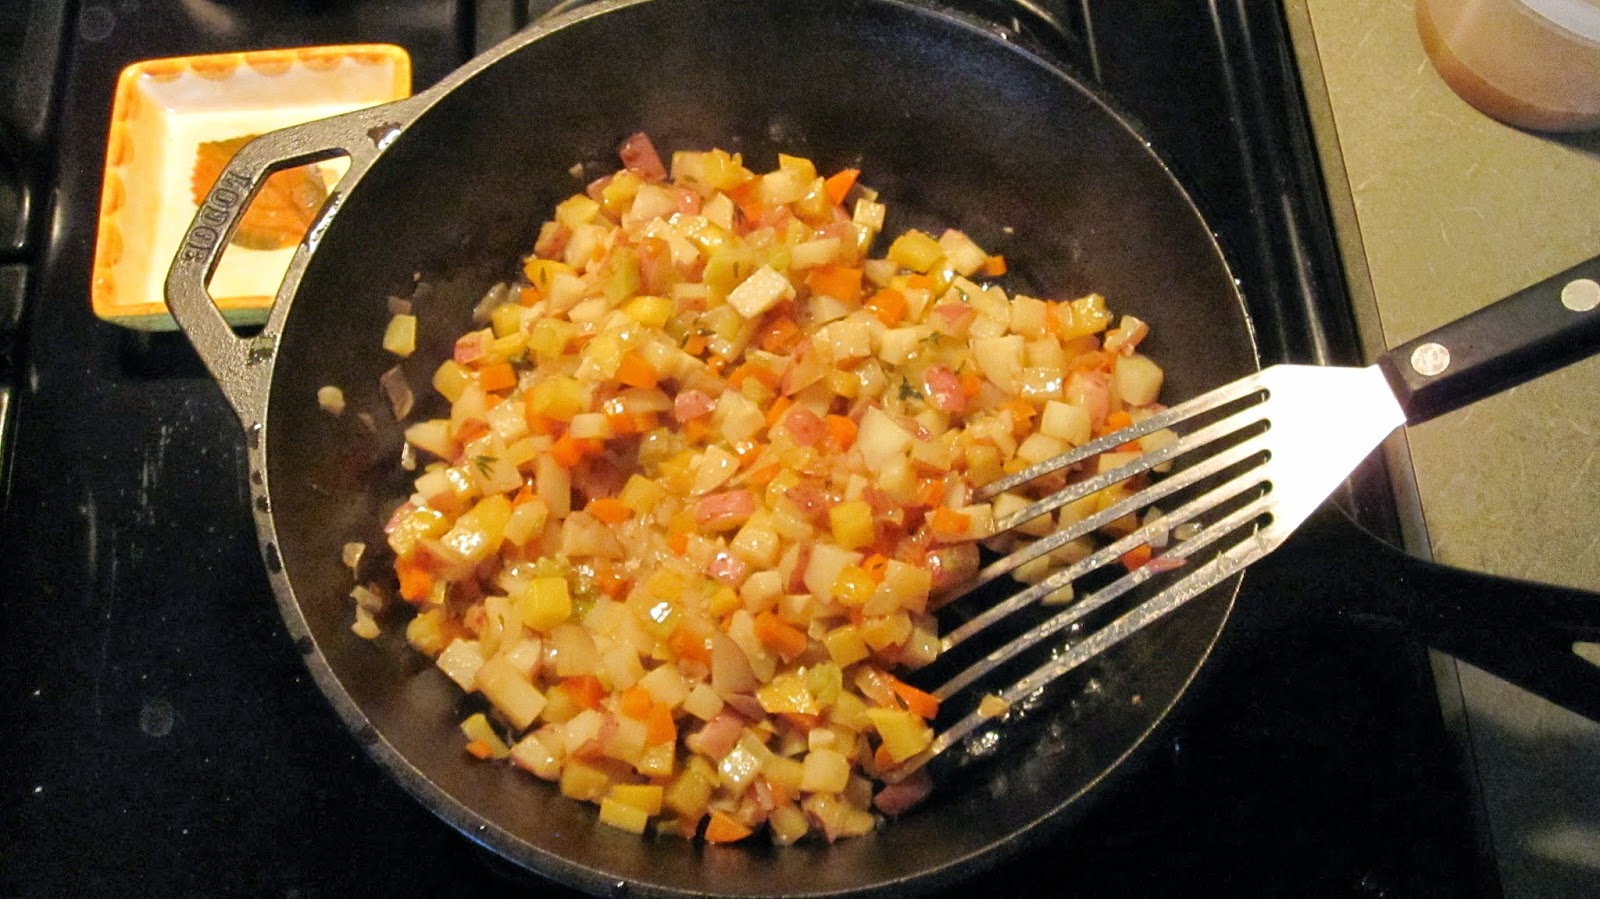
5. For the filling: Heat oil in large skillet over medium heat. Add onion and celery and cook 5 to 7 minutes, or until onion is lightly browned.  Add garlic and cook for about a minute more. Add rutabaga, potato, carrot, and thyme and cook about 3 minutes.  Add 1/2 cup water, cover pan and reduce heat to low.  Steam vegetables 10 to 12 minutes, or until tender.


Sauteed filling.

I got this Lodge "multicooker" for my husband.  I think I use it more than he does.  

Steamed filling.

6. Whisk 1 egg with mustard in large bowl. Stir in cooked vegetables and cheddar and season with salt and pepper to taste. 
7. Preheat oven to 400°F. Line a baking sheet with a non-stick silicone mat or parchment paper.  
8. Remove one disc of dough from the refrigerator.  Cut into eight equal pieces using a pizza wheel or knife.  


Form each section into a rough ball, flatten slightly and dust with flour.  

Roll each piece of dough into a 5 inch disc of ¼-⅛ inch thickness.  
I used the press to make the discs and flattened them out slightly with the rolling pin.

You can use a tortilla press to make quick work of this task.


Using a pie crust bag will ensure the dough doesn't stick to the press.  You could also use a plastic bag, cut open along the seems.

Repeat with remaining dough. 
9. Fill each disc with 2-3 tablespoons of filling. Fold dough over filling to make a semicircle. Press dough around filling to remove any air, making sure no filling leaks out of edges. Crimp edges with your fingers or fork tines to seal. 


A cookie scoop works well here to portion out the filling.

The bottom left pie is starting to melt.  Better get these babies in the oven!  Also, used a fork on that bottom left one...not very pretty.  I sealed the rest by hand.  

Repeat with remaining dough and filling. 
10. Bake on prepared baking sheet 25 to 30 minutes, rotating sheet halfway through baking for even browning.  Let cool 5-10 minutes before taking a bite, enjoy!


Ahhh.

And yum.


Shared at Clever Chicks Blog Hop.